Hey everyone, it’s Jake here from the Duty Belt Co. – quick question for all the guys and gals who rock a duty belt day in and day out: when was the last time you actually thought about what you do with that thing when you get home, clock out, and dump all your gear on your couch? I see it all the time on shift: someone’s belt slung over a folding chair in the break room, tangled in a pile of rain gear, or crumpled in the back of their truck because they “don’t have time” to put it away. But here’s the thing – I’ve been in this game for 12 years, first as a patrol officer, now running the shop, and bad storage isn’t just an annoyance. It’s the #1 reason we get calls about belts stretching out of shape, retaining rings popping off, or that trusty old baton starting to scratch up your uniform. Today, I’m breaking down exactly how to store your duty belt when it’s not in use, no fancy tools required, and most of this stuff you probably already have lying around. Let’s dive in. Duty Belt
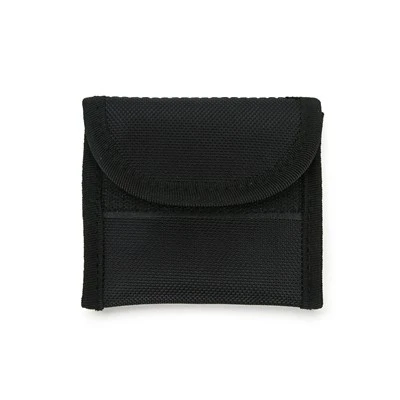
First off, let’s talk about why this even matters. I know, I know – you’re a first responder, not a closet organizer. Your focus is on showing up ready, not polishing your belt after your shift. But think about it: a duty belt is built to carry 15-20 pounds of gear – gun, cuffs, radio, flashlight, maybe a taser – all day, every day. The materials we use (high-density nylon, reinforced Kydex, steel hardware) are tough, but they’re not indestructible. If you leave that belt loaded up, draped over a hard edge (like a chair arm or a countertop), two things happen fast. First, the nylon webbing stretches permanently. I see this all the time: a cop comes in with a belt that’s 2 inches too big after just 6 months, swears they didn’t over-tighten it. Nope, they left it loaded on their truck seat overnight, and gravity did all the work. Second, the hardware – snaps, D-rings, belt keepers – gets worn unevenly when the whole weight of the gear is pulling on one side. That’s when you end up with a loose cuff case or a radio that slips down mid-patrol. Trust me, I learned this the hard way my third year on the job. I’d dump my belt on the edge of my locker, never unclip anything, and by month 7, my belt was so saggy I had to add an extra keeper just to keep my gun holster from sliding to my hip bone. That’s not a small inconvenience – that’s a safety issue. If your gear is shifting while you’re running a call, you’re not focused on the bad guy, you’re adjusting your belt. So let’s fix that.
The first rule of good storage: always unload the belt before putting it away. I know, it’s tempting to just yank the whole thing off and toss it, but take 60 seconds to undo each piece. Take off your holster, unclip the radio, pull out the cuffs and OC spray, set them aside. Why? Not just to make storing easier – it lets you inspect every part of your gear at the same time. Wipe down the holster for gun residue, check your cuffs for rust, make sure your D-rings aren’t loose. That’s a quick pre-check that could save you headaches later, and it takes barely any time. I keep a little bin on my workbench with all my gear slots – holster here, radio there, so I never forget where anything goes. No more digging through a pile of jackets at 5 a.m. looking for your OC spray. Win-win.
Next, choose the right storage spot, and no, the back of your closet floor doesn’t count. Let’s be real, most of us don’t have a dedicated gear room, so we work with what we’ve got. The best spots are cool, dry areas away from direct sunlight. Sunlight is the enemy of nylon and Kydex – it fades the material, makes it brittle over time, and breaks down the glue in holsters. I’ve seen a customer bring in a belt that crumbled after a year because he kept it hanging on a nail by his front door, exposed to sun all day in his truck. Not cool. So avoid windowsills, car dashboards, that spot above your fridge that gets warm. Go for a closet rod, a hook on the back of a bedroom door, a shelf in your basement (as long as it’s not damp – mold is another belt killer) or even a dedicated gear bag if you travel a lot.
Now, how to actually hang it up, because just shoving it on a hook wrong is the same as leaving it draped over a chair. This is where most people mess up. If you hang the belt by the main waistband alone, loaded or unloaded, it will develop a weird curve, like a banana, over time. That’s not a big deal at first, but after a few years, it won’t sit right on your hips anymore – it’ll twist, and your holster will point the wrong way. So the trick is twofold: first, hang it by both ends, evenly spaced. If your belt is 38 inches, don’t just hook the left end on a nail – get a hook that can hold two spots, or use two nails 36 inches apart (leave a little slack so it doesn’t pull tight). That way, the weight is distributed evenly, no weird curve. Second, if you can, hang it with the hardware facing out, not in. That keeps the snaps and D-rings from getting tangled in clothes, and you can see if any of them are loose just by glancing at it.
What if you don’t have a good hook to hang it? No problem. A lot of officers keep a gear rack or a utility hook in their home or station locker. We actually design our belts to work with the standard 1.5-inch hooks you can pick up at any hardware store, so you don’t need a fancy accessory. If you’re at the station, many departments have gear rooms with wall-mounted racks – use those, not the folding chair by the vending machine. That’s not just for your belt’s sake, it keeps the station neat too, and your gear will be there when you need it for your next shift.
Wait, what if you store your belt long-term? Like, if you’re on leave for a month, or switching to a different unit and your belt is in storage for a while? That’s a little different, and I’ve seen way too many guys ruin good belts this way. If you’re storing it for more than a week or two, do a deep clean first. Wipe down the nylon with a mild soap and water (no harsh chemicals, they break down the material), dry it completely, then sprinkle a little bit of cornstarch inside the holster and the webbing to absorb any moisture – that keeps mold and mildew away. Then, fold the belt loosely (don’t cram it into a tight circle!) and wrap it in a cotton sheet or a breathable gear bag. Never use plastic – plastic traps moisture, even if it feels dry, and you’ll come back to a moldy, stinky belt. I had a buddy who deployed for 6 months and stored his belt in a plastic bin, came back and it smelled so bad he had to throw half the gear away. Don’t do that.
Another big one: avoid piling things on top of your belt. If you stack boxes, uniform bags, or gear on top of your stored belt, that adds pressure that can flatten the webbing permanently, or bend the metal snaps. I know space is tight, so if you have to store it on a shelf, put it at the top, so nothing heavy is on it. If it’s in a drawer, lay it flat, not folded, and make sure there’s nothing else in the drawer with it that can scratch the Kydex holster. We get so many complaints about scratched holsters, and 9 times out of 10 it’s because someone stuffed their belt in a drawer with their handcuff keys or a radio that’s got sharp edges.
Wait, what about leather belts? A lot of older officers still swear by leather, and the same rules apply but with a couple extra steps. Leather needs to be conditioned every 6 months, and when storing it, keep it away from extreme dryness or dampness. If leather gets too dry, it cracks; too damp, it warps. So if you have a leather belt, hang it in a spot with consistent room temperature, and condition it before you put it away for a long stretch. I always recommend a neatsfoot oil conditioner, not the cheap stuff from the auto store – it keeps leather flexible without gunking up the hardware.
Let me throw in a quick pro tip from our shop for all you folks with limited space: if you have to store your belt on a hook that only fits one end, add a belt hanger accessory. They’re like little plastic clips that hook onto both sides of your belt so you can hang it evenly on a single hook. We sell these for $5 a pair, and they’re a game-changer for anyone who’s crammed into a small locker or a tiny closet. Way cheaper than replacing a stretched or warped belt, that’s for sure.
Now, let’s talk about common mistakes I see all the time that you can easily avoid. Number one: storing your belt loaded. I touched on this earlier, but it’s worth repeating. Leaving all your gear attached to the belt overnight puts constant, uneven stress on the webbing and hardware. Even if you have a “light load” – just a gun and cuffs – that’s enough to stretch the belt over time. Take it off, unclip it, it takes 2 minutes and saves you from a whole lot of hassle. Number two: storing it in the trunk of your car. Yeah, I get it, some officers keep a backup belt in their trunk. But don’t leave it there long-term. Trunks get hot as hell in the summer, freezing cold in the winter, and it’s damp too. That’s a one-way ticket to a brittle, cracked belt and rusty hardware. If you need a backup, keep it in a hard, waterproof case in your backseat, not the trunk. Number three: using a hanger that’s too small. A regular shirt hanger is too skinny, right? If you hang your belt on a wire hanger, it will dig into the webbing and create a mark. Use a wide, padded hanger if you don’t have a belt-specific hook – it distributes the weight evenly and keeps those annoying creases from forming.
Let me circle back to why this matters for you, not just for your gear. As first responders, your gear is your lifeline. If your belt is saggy, your holster is misaligned, or your hardware is worn out, that’s a safety risk for you and the people you’re sworn to protect. I’ve seen so many close calls: an officer’s cuff case came unclipped while he was arresting a suspect, because the D-ring was worn out from being left on a hard edge. A rookie’s gun slid down his hip mid-shoot because his belt was stretched from being stored wrong. None of that is worth saving 2 minutes after your shift. Taking care of your duty belt is part of taking care of your job.
At the end of the day, storing your duty belt isn’t rocket science. It’s about 5 simple steps: unload every piece of gear after your shift, clean it off quickly, hang it evenly in a cool, dry spot away from sunlight, don’t stack anything on it, and give it a once-over for wear every time you put it away. That’s it. It takes almost no time, and it will double the lifespan of your belt, save you money on replacements, and keep your gear working when you need it most.
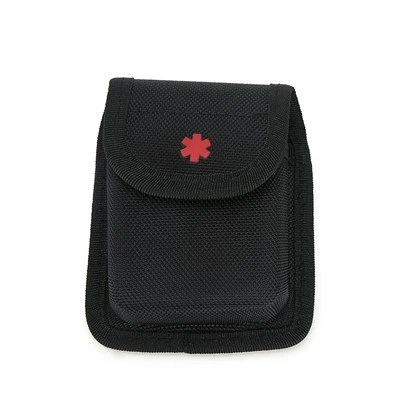
If you’re in the market for a new duty belt that’s built to last, or you need storage accessories like those hanger clips I mentioned, our shop has you covered. We make belts with reinforced webbing and hardware that’s tested to hold up to whatever you throw at it, and we’re always here to help if you have questions about care or storage. Whether you’re a new officer just starting out or a veteran with 20 years on the job, we know your gear matters, and we’re here to make sure you’ve got what you need to keep it in top shape. If you want to chat about your current setup, or place an order, hit us up anytime.
Tactical Gear References
- National Institute of Justice. (2021). "Care and Maintenance of Law Enforcement Duty Gear." U.S. Department of Justice.
- International Association of Chiefs of Police. (2022). "Best Practices for Duty Equipment Storage and Inspection." IACP Professional Standards Division.
- Blackhawk Industries. (2020). "Duty Belt Durability Guide: Material Stress and Storage Impacts." Tactical Gear Research & Development.
Quanzhou Jinbei Bags Co., Ltd.
As one of the most professional duty belt manufacturers and suppliers in China, we have world-leading production equipment and strong manufacturing capabilities. Please feel free to buy bulk high quality duty belt for sale here from our factory. Customized orders are welcome.
Address: 302, NO. 158-17, EAST DISTRICT, TANDING, HESHI, LUOJIANG , QUANZHOU, FUJIAN, CHINA
E-mail: jinbeibags@126.com
WebSite: https://www.jinbeibags.com/
